Mon Panier

| Désignation | Référence | Qté |
|---|
| Désignation | Référence | Qté |
|---|
KC0022A KC0019A
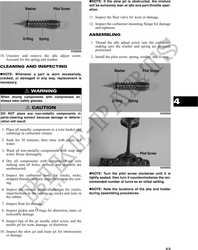
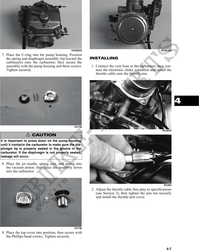
7. Place the U-ring into the pump housing. Position
the spring and diaphragm assembly (lip toward the INSTALLING
carburetor) onto the carburetor; then secure the
assembly with the pump housing and three screws. 1. Connect the vent hose to the carburetor; then con-
Tighten securely. nect the electronic choke connector and install the
throttle cable onto the throttle arm.
4
CC748
KC264A
! CAUTION
It is important to press down on the pump housing
until it contacts the carburetor to make sure the dia-
phragm lip is properly seated in the groove in the
carburetor. If the diaphragm is not properly seated,
leakage will occur.
8. Place the jet needle, spring seat, and spring into
the vacuum piston; then place the assembly down
into the carburetor.
KC263
2. Adjust the throttle cable free-play to specifications
(see Section 2); then tighten the jam nut securely
and install the throttle arm cover.
CC746
9. Place the top cover into position; then secure with
the Phillips-head screws. Tighten securely.
4-7