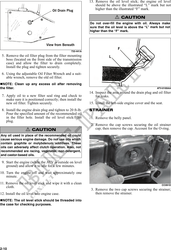
13. Remove the oil level stick; the engine oil level
should be above the illustrated "L" mark but not
higher than the illustrated "F" mark.
! CAUTION
Do not over-fill the engine with oil. Always make
sure that the oil level is above the "L" mark but not
higher than the "F" mark.
733-441A
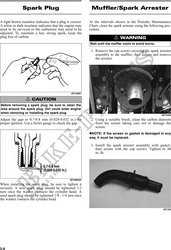
5. Remove the oil filter plug from the filter mounting
boss (located on the front side of the transmission
case) and allow the filter to drain completely.
Install the plug and tighten securely.
6. Using the adjustable Oil Filter Wrench and a suit-
able wrench, remove the old oil filter.
NOTE: Clean up any excess oil after removing
the filter. ATV-0100AA
14. Inspect the area around the drain plug and oil filter
7. Apply oil to a new filter seal ring and check to for leaks.
make sure it is positioned correctly; then install the
new oil filter. Tighten securely. 15. Install the left-side engine cover and the seat.
8. Install the engine drain plug and tighten to 20 ft-lb. STRAINER
Pour the specified amount of the recommended oil
in the filler hole. Install the oil level stick/filler 1. Remove the belly panel.
plug.
2. Remove the cap screws securing the oil strainer
! CAUTION cap; then remove the cap. Account for the O-ring.
Any oil used in place of the recommended oil could
cause serious engine damage. Do not use oils which
contain graphite or molybdenum additives. These
oils can adversely affect clutch operation. Also, not
recommended are racing, vegetable, non-detergent,
and castor-based oils.
9. Start the engine (while the ATV is outside on level
ground) and allow it to idle for a few minutes.
10. Turn the engine off and wait approximately one
minute.
11. Remove the oil level stick and wipe it with a clean CC091D
cloth.
3. Remove the two cap screws securing the strainer;
12. Install the oil level into engine case. then remove the strainer.
NOTE: The oil level stick should be threaded into
the case for checking purposes.
2-10