Mon Panier

| Désignation | Référence | Qté |
|---|
| Désignation | Référence | Qté |
|---|
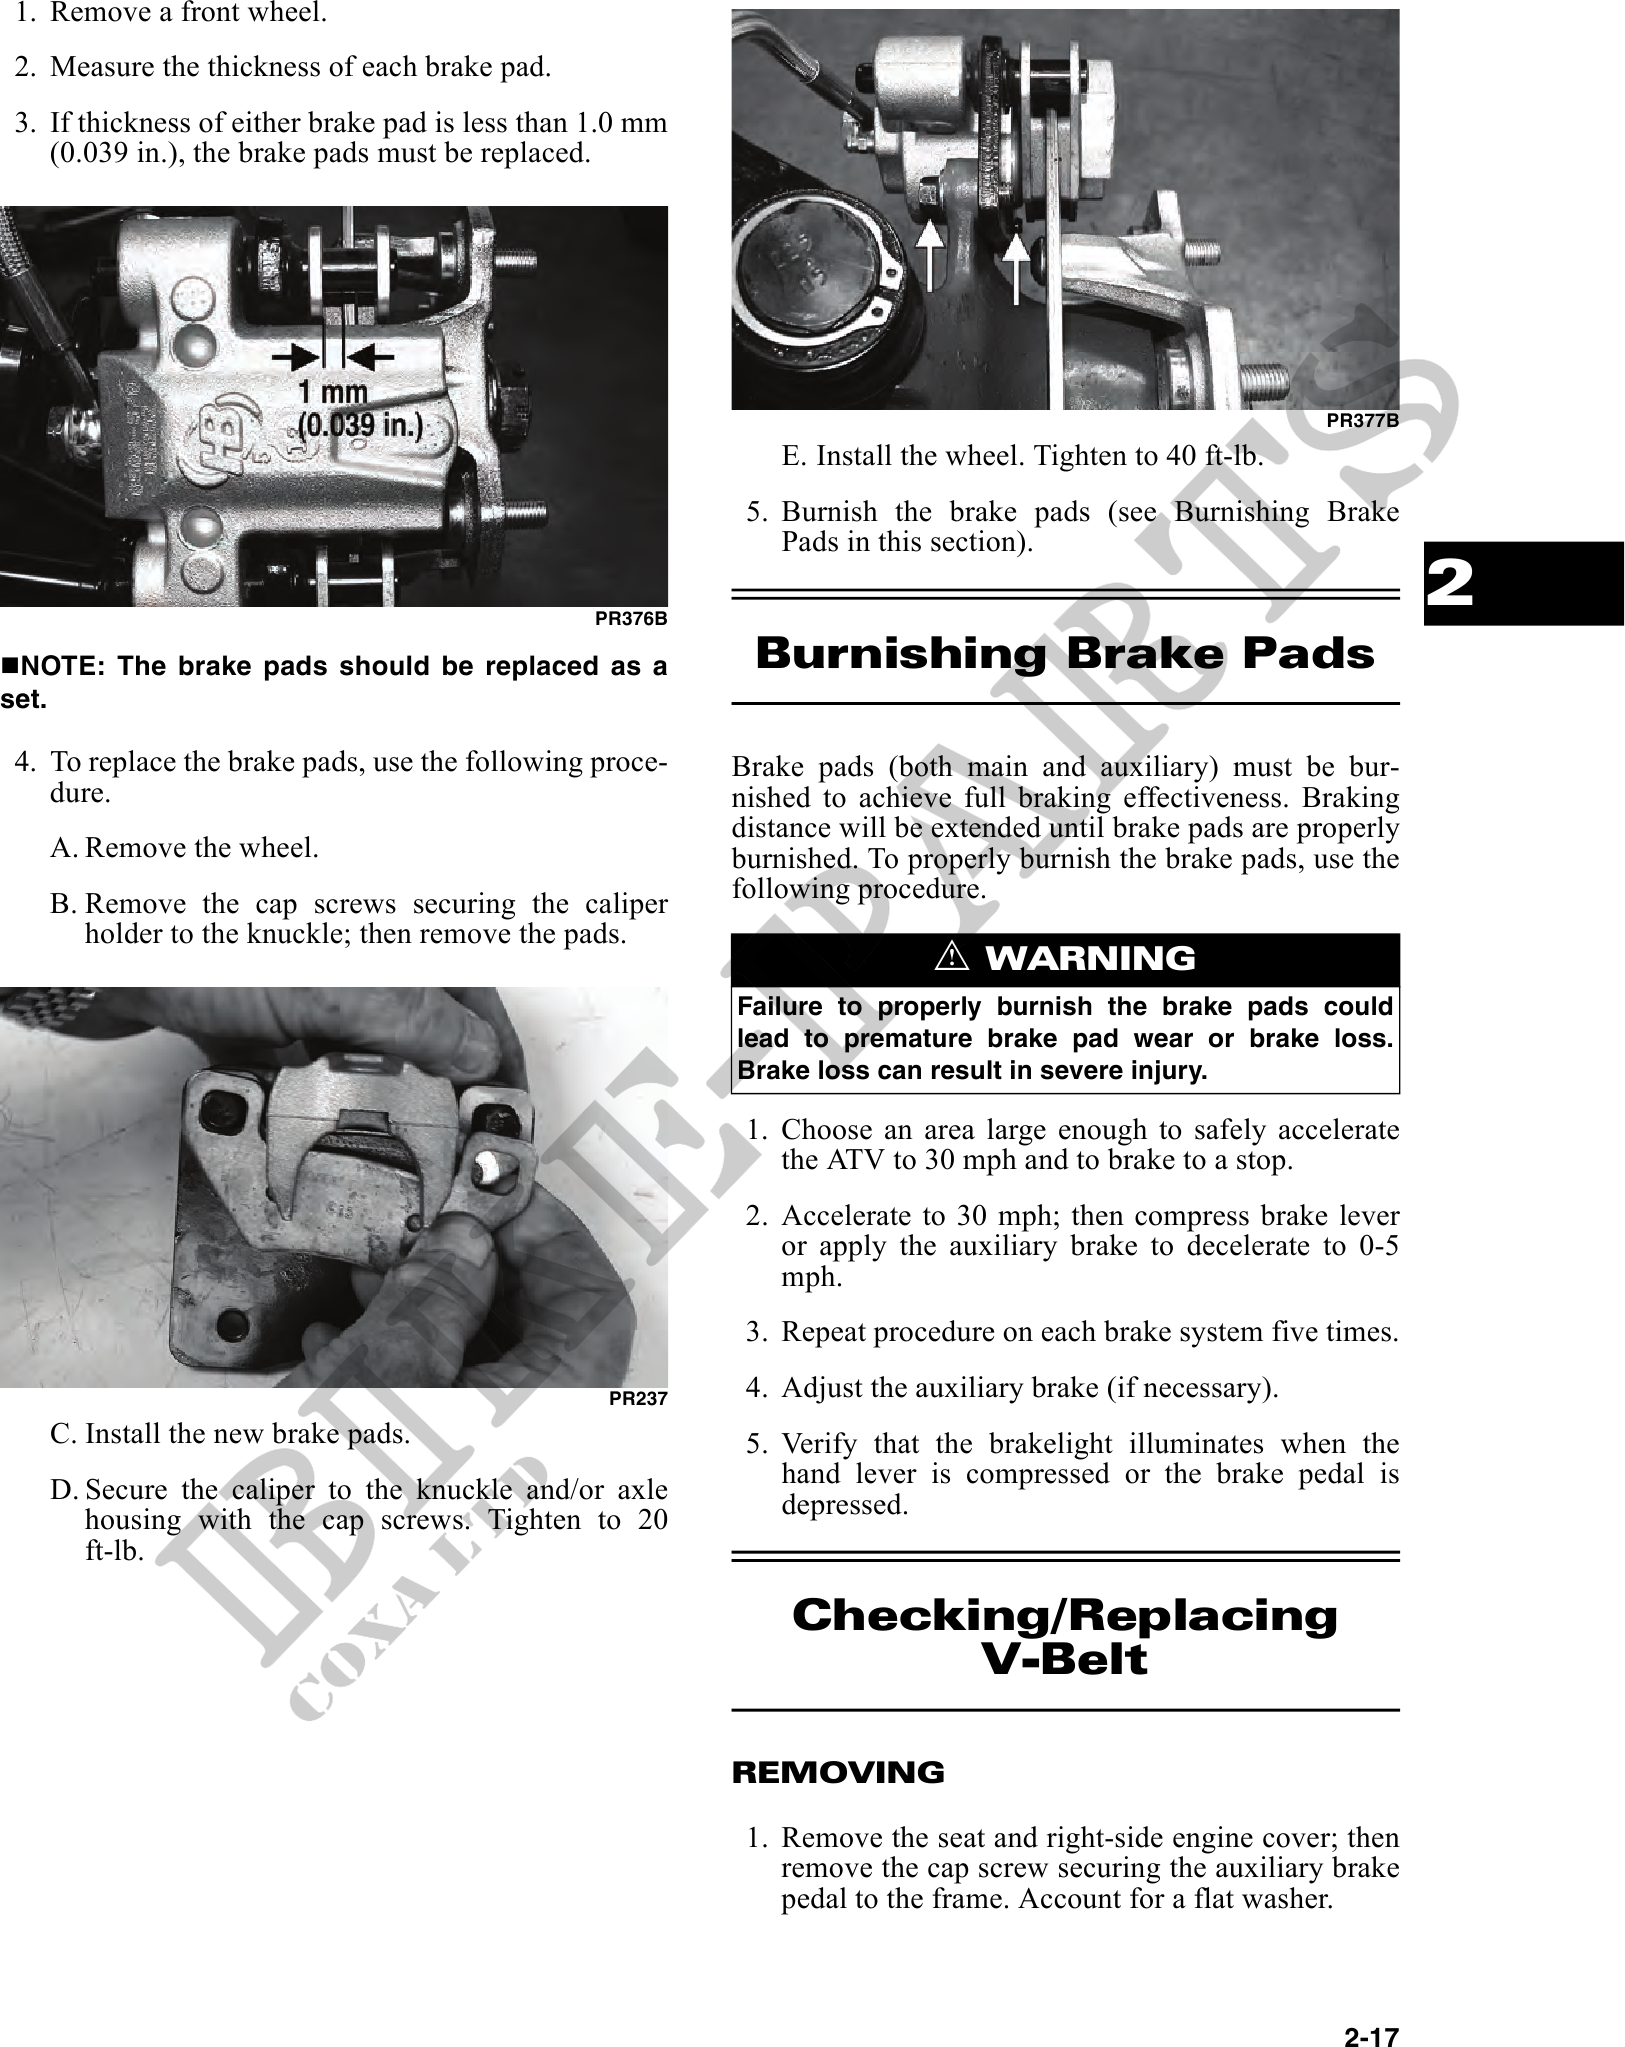
1. Remove a front wheel.
2. Measure the thickness of each brake pad.
3. If thickness of either brake pad is less than 1.0 mm
(0.039 in.), the brake pads must be replaced.
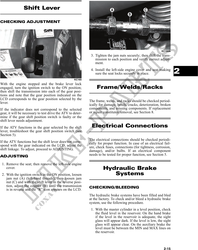
PR377B
E. Install the wheel. Tighten to 40 ft-lb.
5. Burnish the brake pads (see Burnishing Brake
Pads in this section).
PR376B
2
NOTE: The brake pads should be replaced as a Burnishing Brake Pads
set.
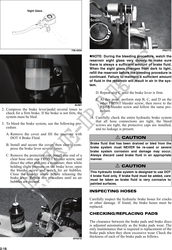
4. To replace the brake pads, use the following proce- Brake pads (both main and auxiliary) must be bur-
dure. nished to achieve full braking effectiveness. Braking
distance will be extended until brake pads are properly
A. Remove the wheel. burnished. To properly burnish the brake pads, use the
B. Remove the cap screws securing the caliper following procedure.
holder to the knuckle; then remove the pads.
! WARNING
Failure to properly burnish the brake pads could
lead to premature brake pad wear or brake loss.
Brake loss can result in severe injury.
1. Choose an area large enough to safely accelerate
the ATV to 30 mph and to brake to a stop.
2. Accelerate to 30 mph; then compress brake lever
or apply the auxiliary brake to decelerate to 0-5
mph.
3. Repeat procedure on each brake system five times.
PR237 4. Adjust the auxiliary brake (if necessary).
C. Install the new brake pads. 5. Verify that the brakelight illuminates when the
hand lever is compressed or the brake pedal is
D. Secure the caliper to the knuckle and/or axle depressed.
housing with the cap screws. Tighten to 20
ft-lb.
Checking/Replacing
V-Belt
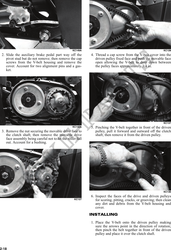
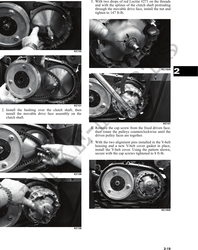
REMOVING
1. Remove the seat and right-side engine cover; then
remove the cap screw securing the auxiliary brake
pedal to the frame. Account for a flat washer.
2-17