Mon Panier

| Désignation | Référence | Qté |
|---|
| Désignation | Référence | Qté |
|---|
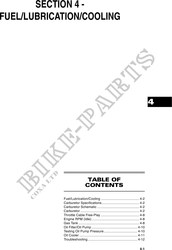
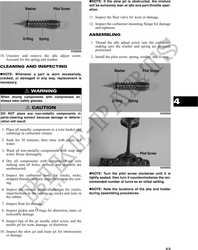
4. Remove the throttle arm cover; then loosen the
jam nut on the throttle cable and remove the throt-
tle cable from the throttle arm. The carburetor can
now be removed for service.
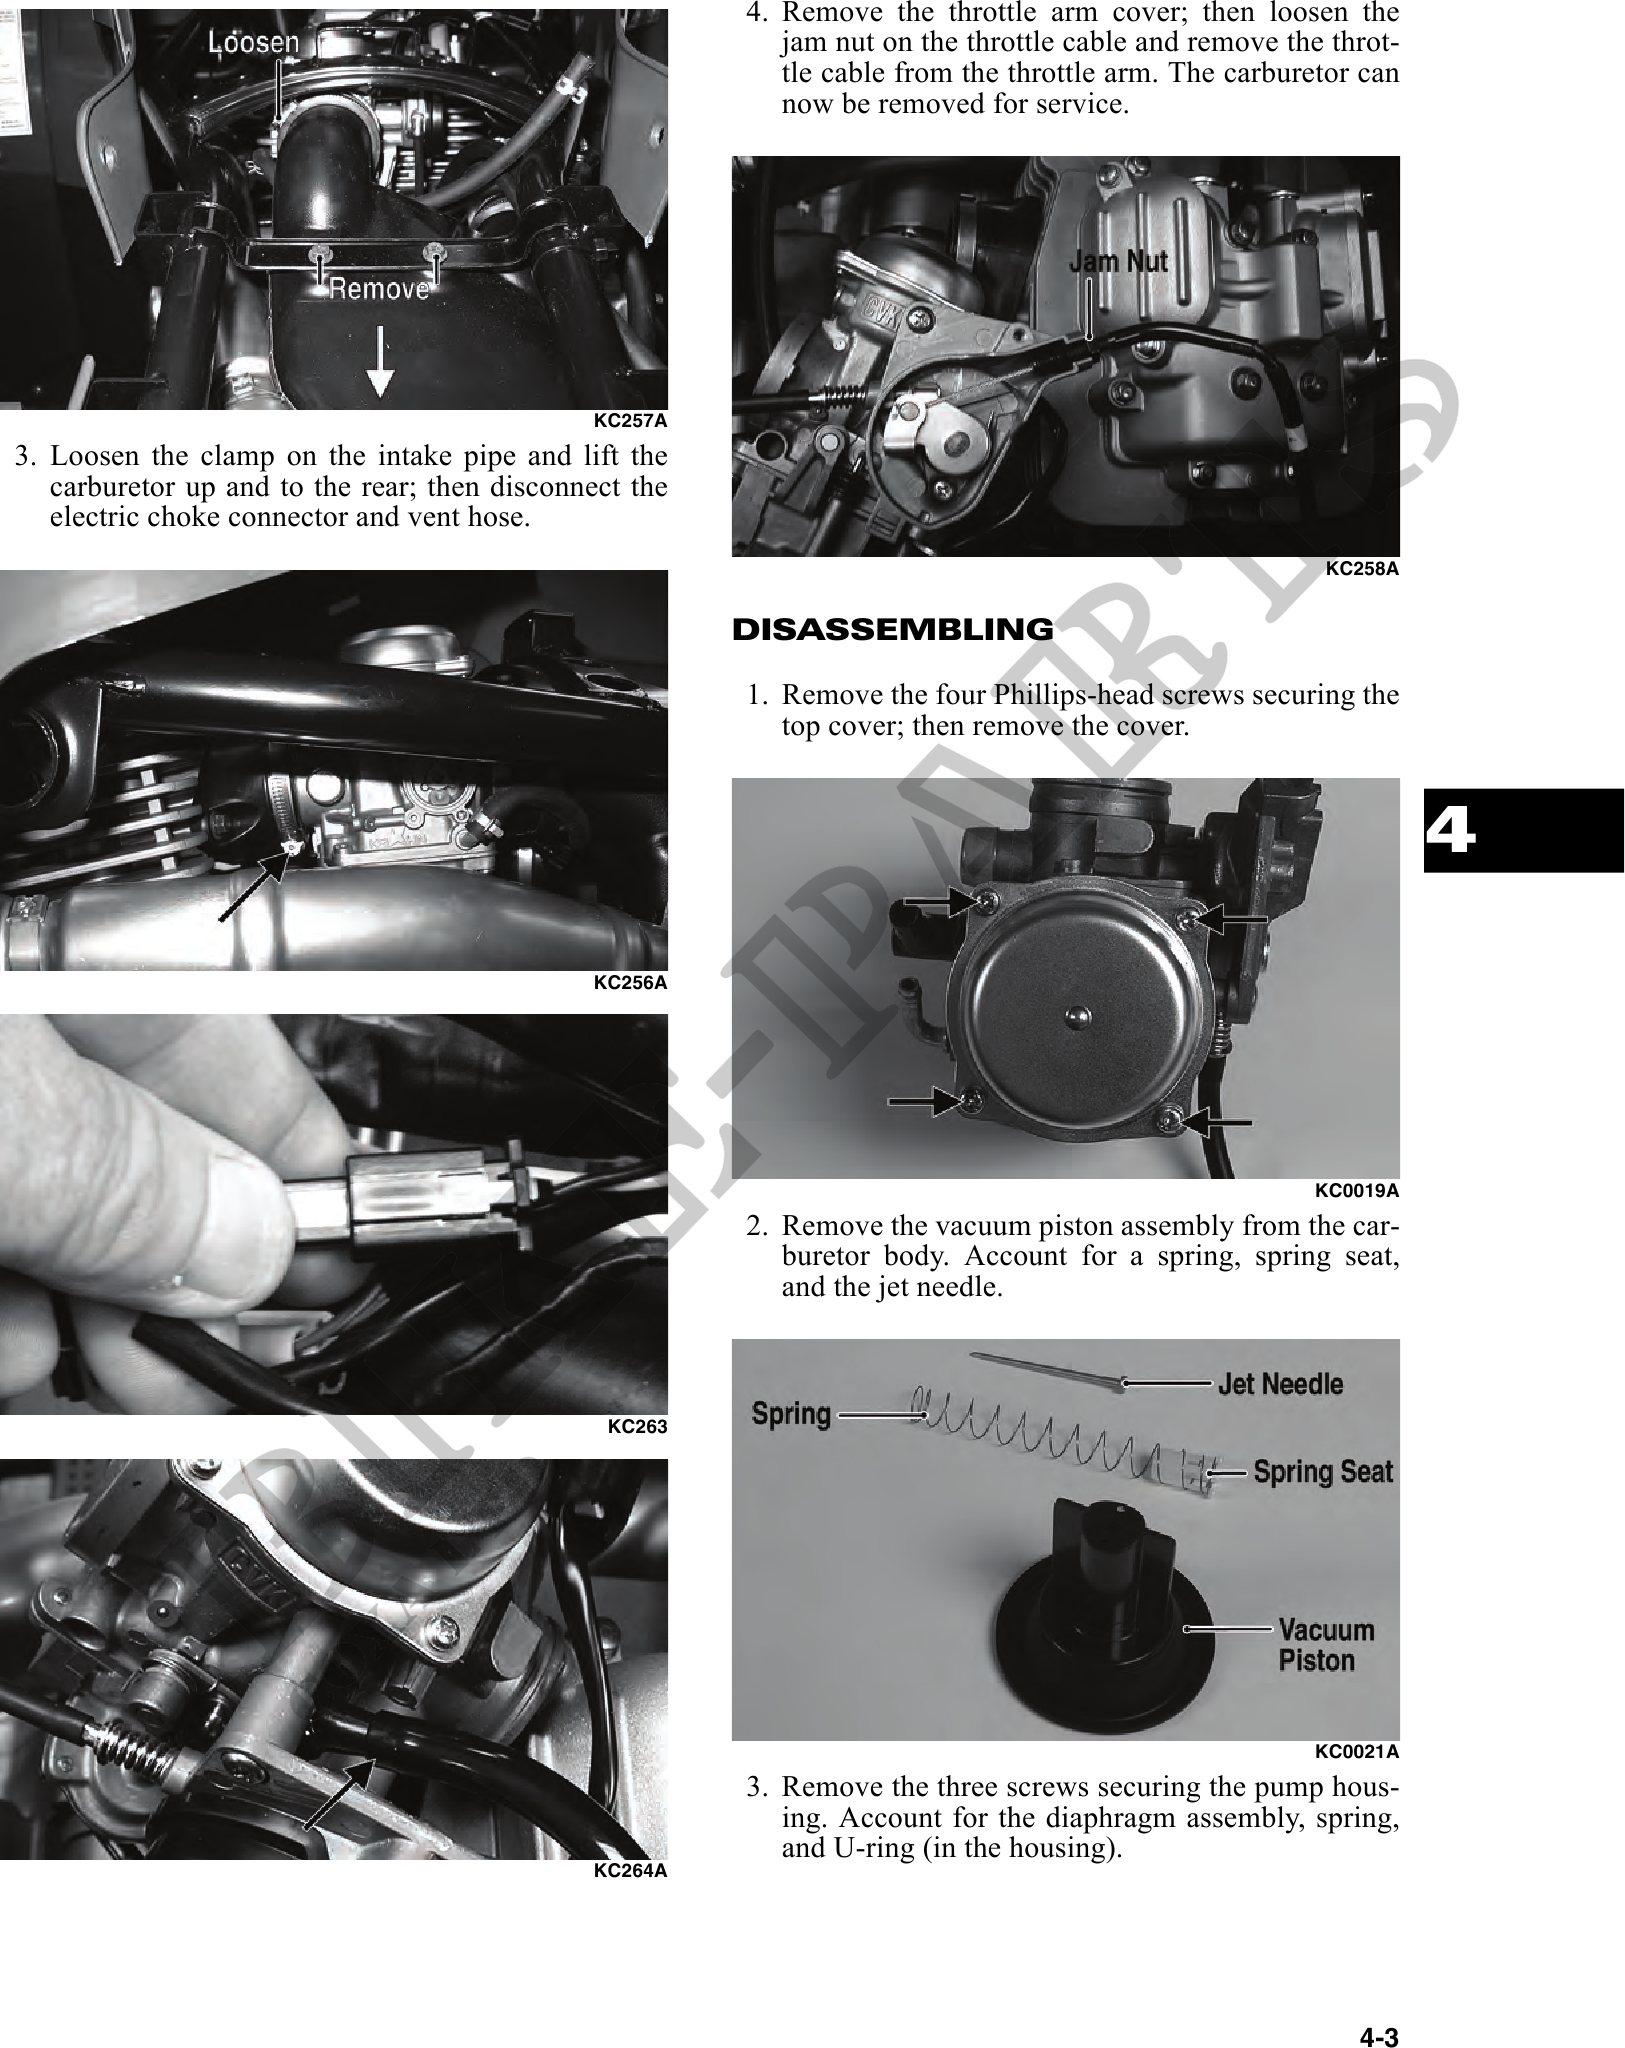
KC257A
3. Loosen the clamp on the intake pipe and lift the
carburetor up and to the rear; then disconnect the
electric choke connector and vent hose.
KC258A
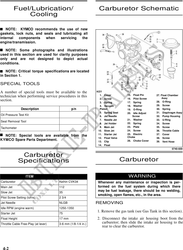
DISASSEMBLING
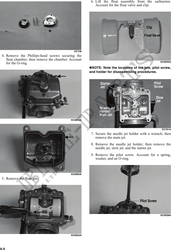
1. Remove the four Phillips-head screws securing the
top cover; then remove the cover.
4
KC256A
KC0019A
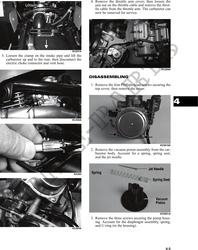
2. Remove the vacuum piston assembly from the car-
buretor body. Account for a spring, spring seat,
and the jet needle.
KC263
KC0021A
3. Remove the three screws securing the pump hous-
ing. Account for the diaphragm assembly, spring,
and U-ring (in the housing).
KC264A
4-3