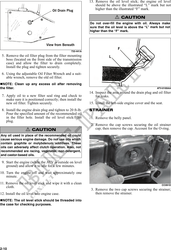
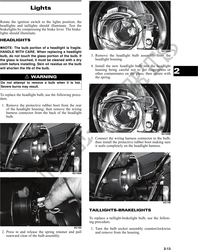
CC163D KC0077A
AT THIS POINT 3. Drain the oil into a drain pan by removing the
drain plug from each.
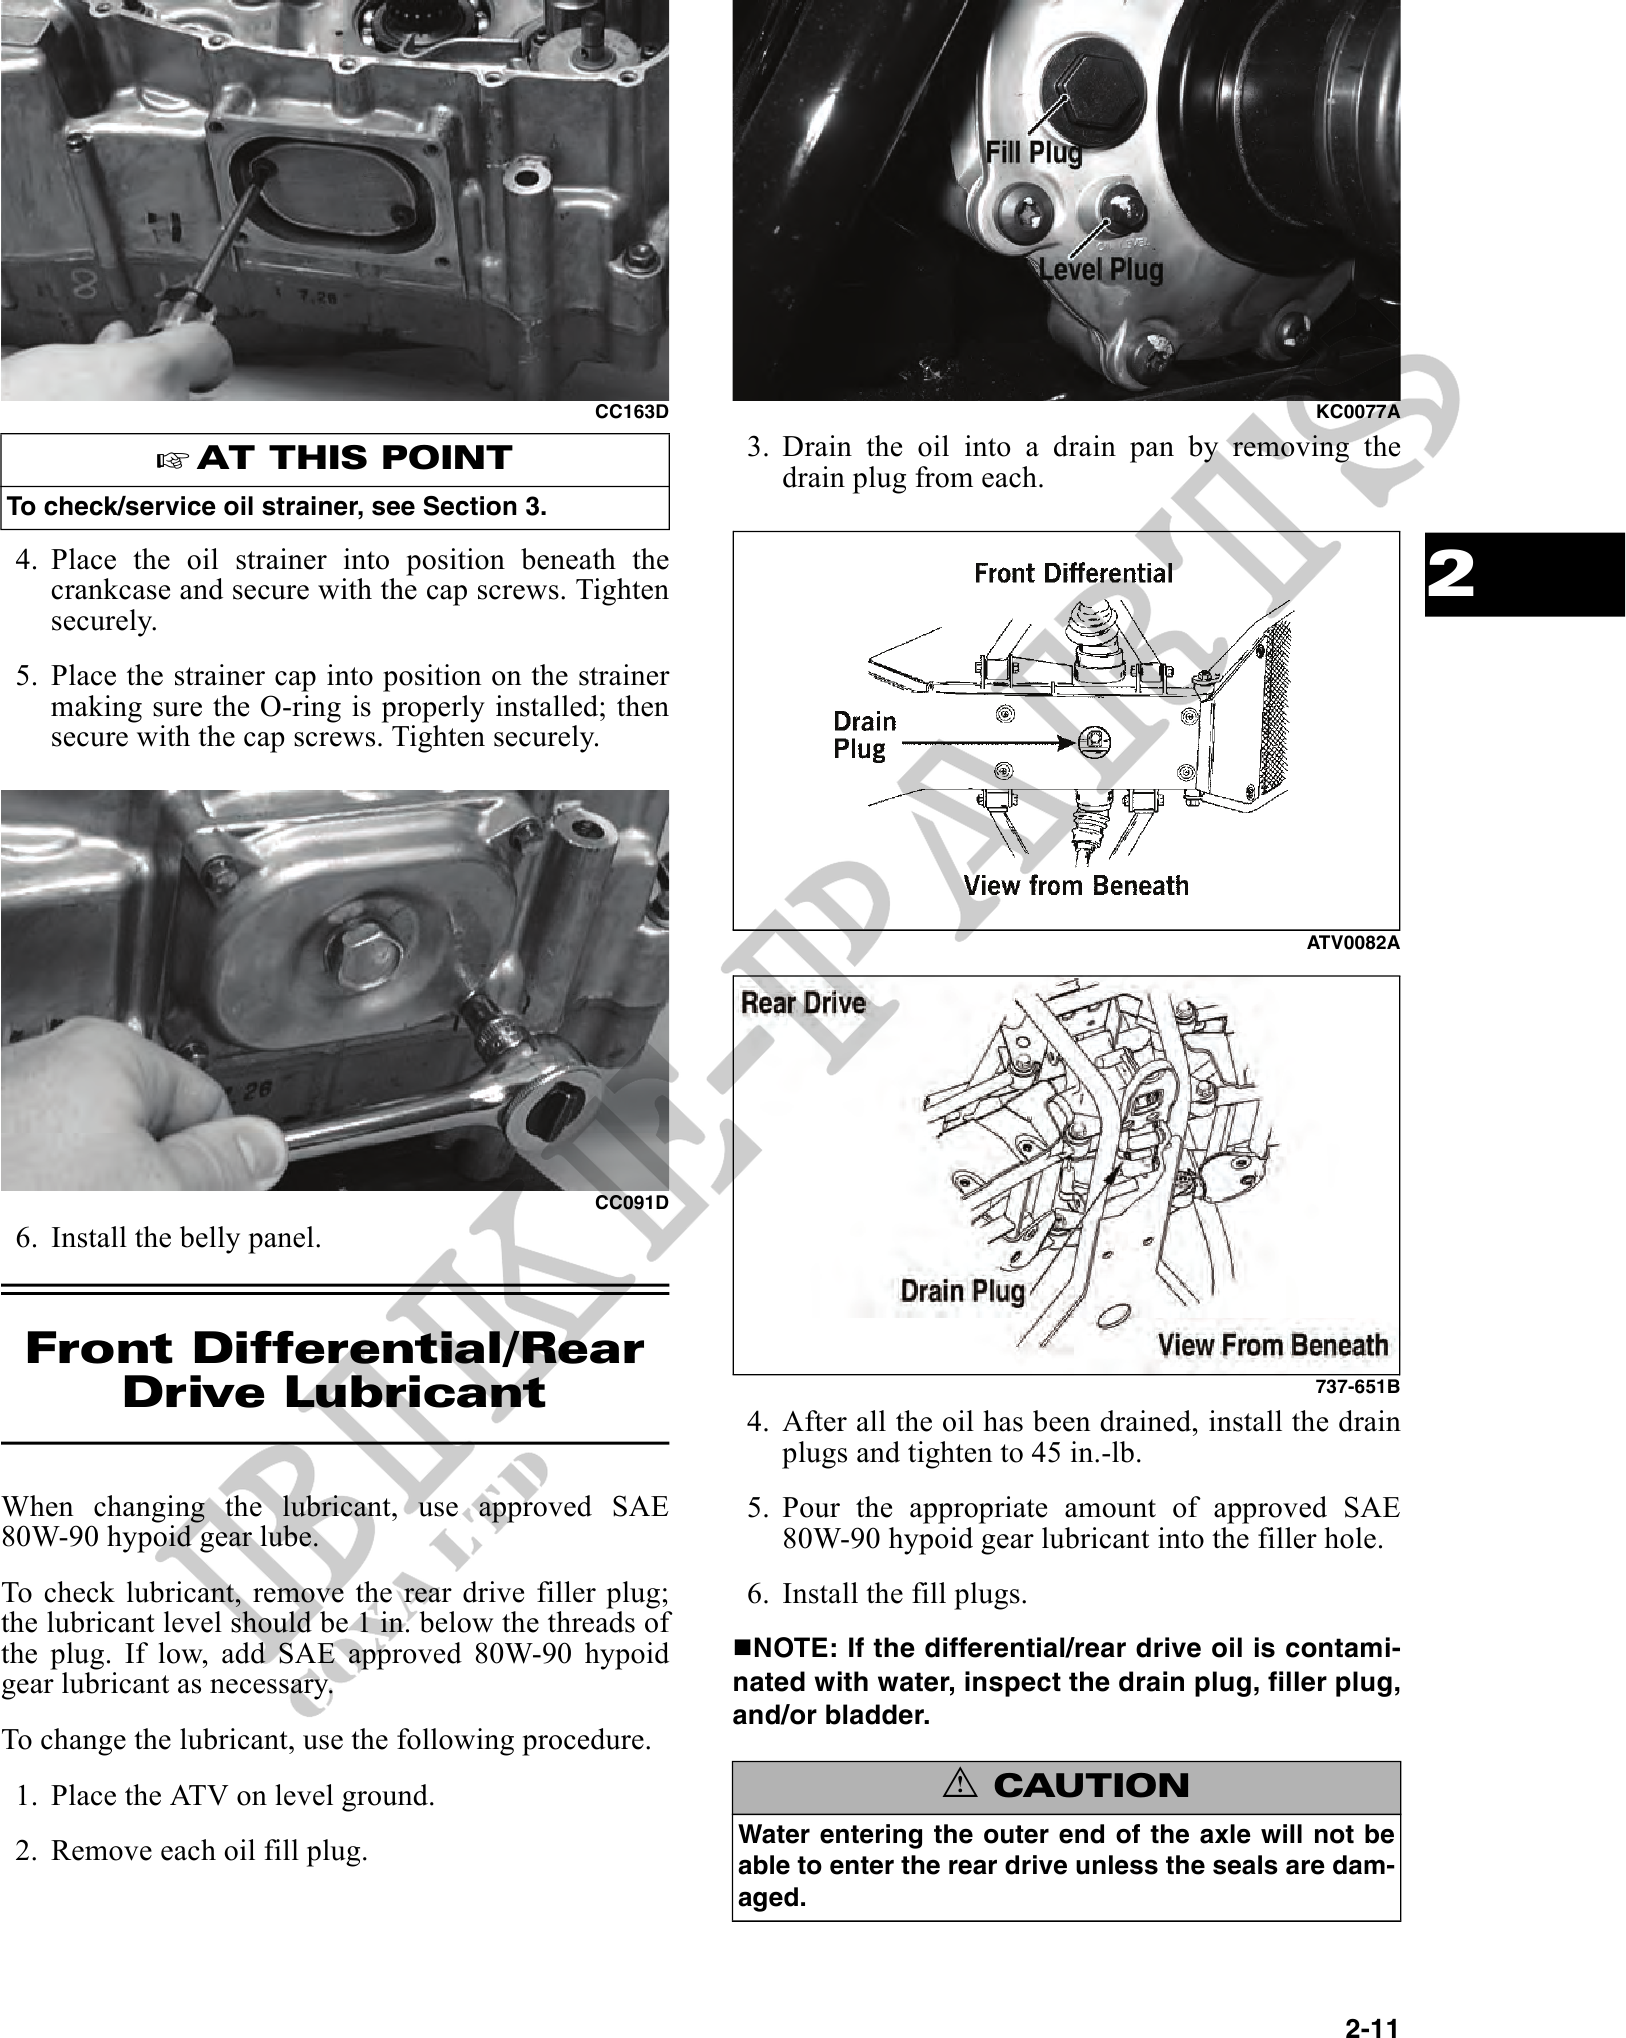
To check/service oil strainer, see Section 3.
4. Place the oil strainer into position beneath the
crankcase and secure with the cap screws. Tighten 2
securely.
5. Place the strainer cap into position on the strainer
making sure the O-ring is properly installed; then
secure with the cap screws. Tighten securely.
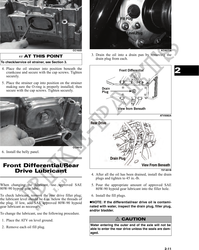
ATV0082A
CC091D
6. Install the belly panel.
Front Differential/Rear
Drive Lubricant 737-651B
4. After all the oil has been drained, install the drain
plugs and tighten to 45 in.-lb.
When changing the lubricant, use approved SAE 5. Pour the appropriate amount of approved SAE
80W-90 hypoid gear lube. 80W-90 hypoid gear lubricant into the filler hole.
To check lubricant, remove the rear drive filler plug; 6. Install the fill plugs.
the lubricant level should be 1 in. below the threads of
the plug. If low, add SAE approved 80W-90 hypoid NOTE: If the differential/rear drive oil is contami-
gear lubricant as necessary. nated with water, inspect the drain plug, filler plug,
and/or bladder.
To change the lubricant, use the following procedure.
1. Place the ATV on level ground. ! CAUTION
Water entering the outer end of the axle will not be
2. Remove each oil fill plug. able to enter the rear drive unless the seals are dam-
aged.
2-11