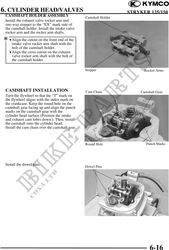
6. CYLINDER HEAD/VALVES STRYKER 125/150
After lapping, wash all residuals off the
cylinder head and valves.
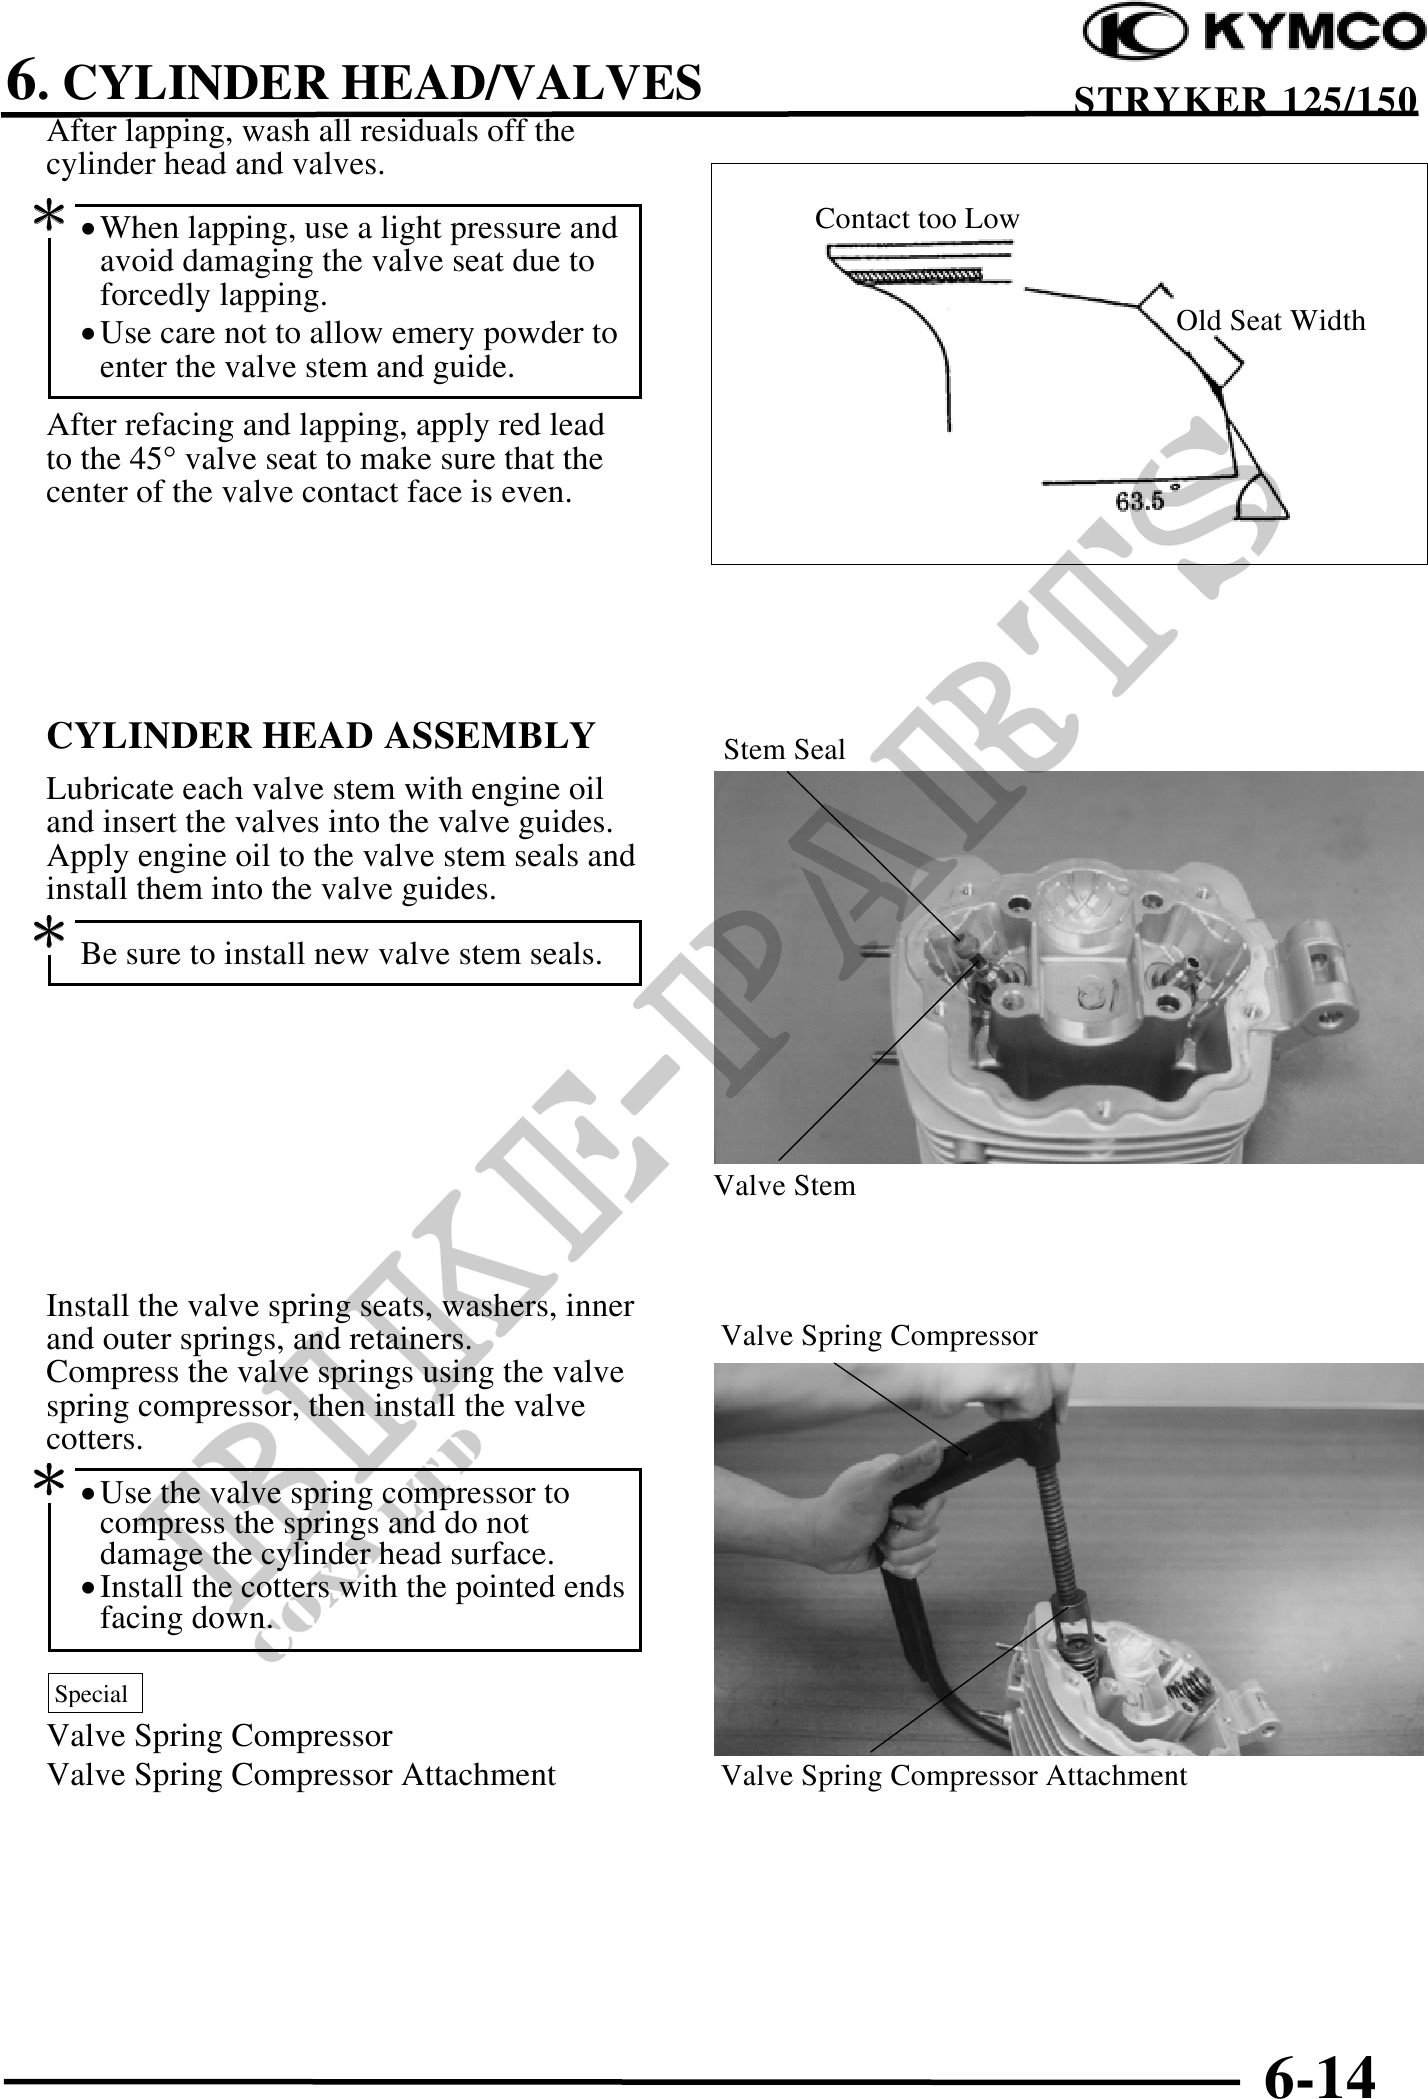
· When lapping, use a light pressure and Contact too Low
avoid damaging the valve seat due to
forcedly lapping.
· Use care not to allow emery powder to Old Seat Width
enter the valve stem and guide.
After refacing and lapping, apply red lead
to the 45° valve seat to make sure that the
center of the valve contact face is even.
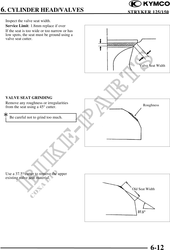
CYLINDER HEAD ASSEMBLY Stem Seal
Lubricate each valve stem with engine oil
and insert the valves into the valve guides.
Apply engine oil to the valve stem seals and
install them into the valve guides.
Be sure to install new valve stem seals.
Valve Stem
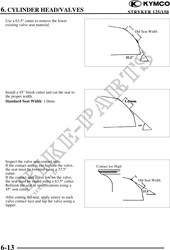
Install the valve spring seats, washers, inner
and outer springs, and retainers. Valve Spring Compressor
Compress the valve springs using the valve
spring compressor, then install the valve
cotters.
· Use the valve spring compressor to
compress the springs and do not
damage the cylinder head surface.
· Install the cotters with the pointed ends
facing down.
Special
Valve Spring Compressor
Valve Spring Compressor Attachment Valve Spring Compressor Attachment
6-14